


How to Make Your Cutting Mat Sticky – Again!
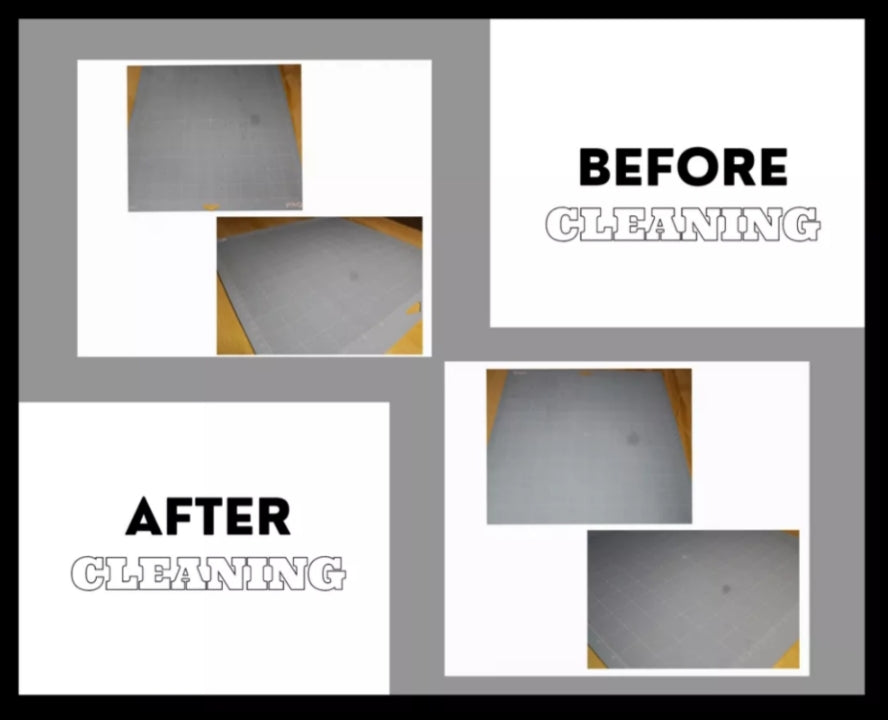
How to Make Your Cutting Mat Sticky – Again!
Materials:
- Warm Water
- Sponge
- Dish Soap
- Paper Towel(Optional)


Materials:
- Masking Tape
- Adhesive Spray
These are the two materials that you’re going to need. The masking tape is to properly stick the cutting mat onto the flat surface. Aside from that, this would also ensure you’re only getting the adhesive spray to where you want it to be.
Not using masking tape for this process can result in a sticky situation in which your cutting mat will stick onto your machine’s rollers, creating a total mess!
The adhesive spray is self-explanatory, as we are trying to get it sticky again. What better way to do that other than using an adhesive spray?
Discover More Great Articles On Crafting
Are you having fun making projects with Heat Transfer Vinyl?
How about trying HTV on wood or on Yoga mats? Please click the links below:
IRON-ON VINYL TO STAMP UNIQUE IMPRINTS ON YOGA MATS
Now let’s get to sticking!
Steps on how to Re-stick your cutting mat:
1. Tape your cutting mat onto a flat surface; remember to keep only the body of the mat exposed!
2. Spray away!
When spraying the mat’s surface, start with an even coat that isn’t too thin. Doing this will ensure that you got a stick on the cutting mat! Try not to spray too far away but at the same time not too close.
Apply a much thinner second layer of the adhesive spray; you can spray at a farther distance to get a thin layer instead of making another thick layer.
Remember that this trick won’t last as long as a new cutting mat. For one, when you use a cutting mat for a lot of things in a short period, it can quickly lose its’ stick. However, people who have a business or cut a lot can use this hack.
Running over a lot of cutting mats isn’t necessarily the goal here. Investing in two products that can be used, such as the adhesive remover and the adhesive sprays, cheaper than a new cutting mat, can be a wise option.
Pink Mat:
As mentioned earlier, the method only applies to green, purple, and blue mats, which is why this blog portion is dedicated to pink mats! Aside from that, there isn’t any way to clean it.
A pink mat contains a different form of adhesive than the other mats. It’s more sensitive. A factor affecting its quality would be touching it with one’s fingertips, as the oil can cause damage.
A scraper tool is a no-no, as it can damage the adhesive on the mat. A piece of advice we can give you is to apply a transparent transfer tape, sticky side up on the cutting mat, then proceed with the material you’re planning on using.
Taking the material off means leaving the transfer tape on the cutting mat. It means that you’re not imposing any residue on the pink mat, and you don’t need to replace the transfer tape over and over.
Now that we’ve got that all sticky again, don’t forget to share this tip with your friends. Save a lot of money instead of investing in a new cutting mat! After all, you can use the funds to buy more colorful vinyl instead!
Made something or did this hack? You can tag us on the social media accounts listed below or send us a direct message so we can feature you on our page!
FB: CraftVinyl.ca
IG: CraftVinyl.ca
TikTok: craftvinyl.ca
Looking for some specialty Heat Transfer Vinyl
Do you need more crafting supplies? Don’t hesitate to check out our online store available at www.craftvinyl.ca Enough said, have a safe and happy crafting, Crafters!


