


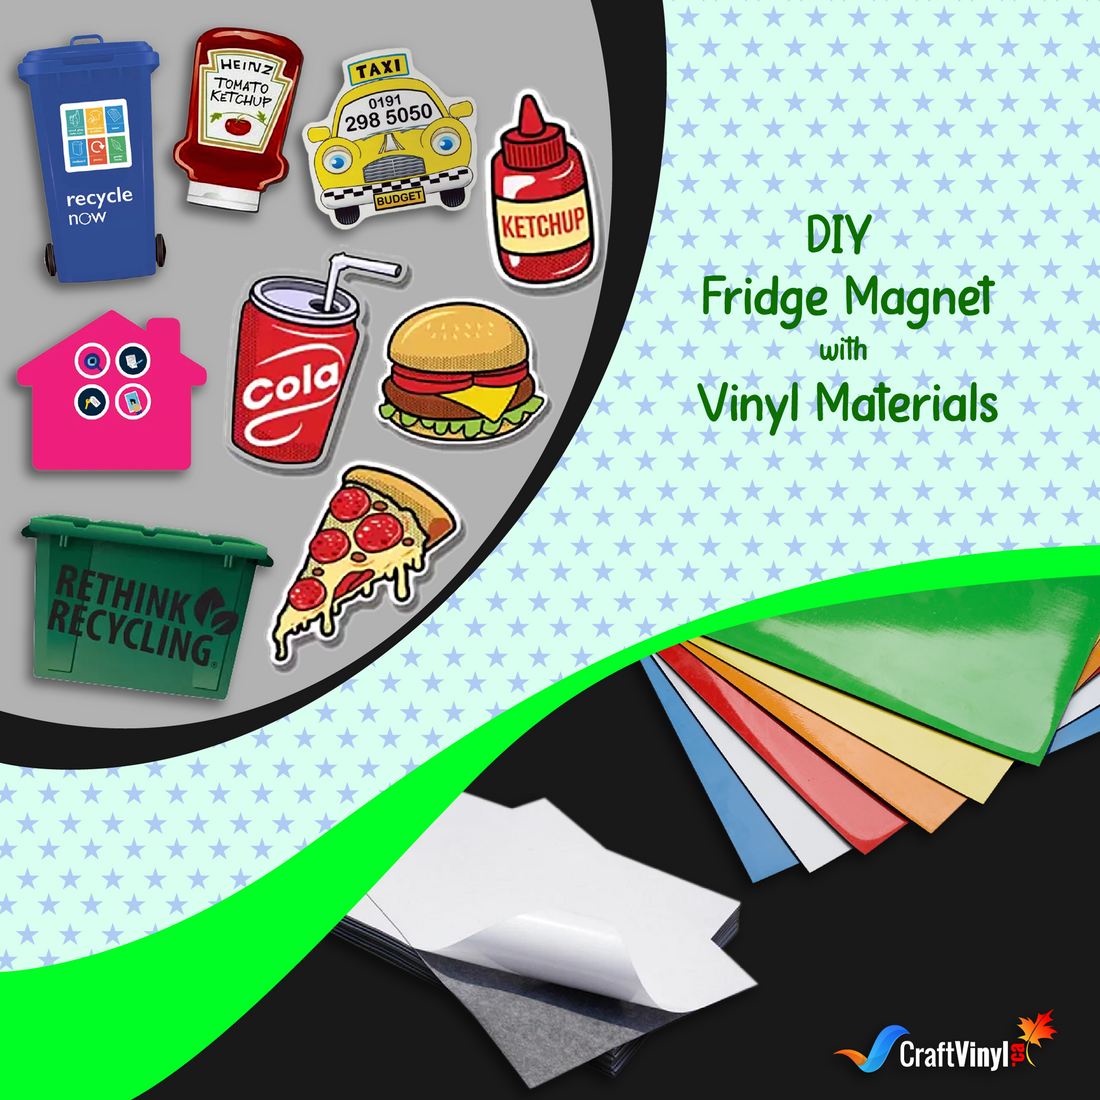
Do-it-Yourself Fridge Magnet with Vinyl Materials
Galvanizing Craft Idea:The Do-it-Yourself Fridge Magnet with Vinyl Materials
Raise a hand if you think I am the only person in this blog who’s guilty of getting obsessed with do-it-yourself projects with Cricut and vinyl materials! Click the “X” icon or the “close” option of this page if you think the variety of vinyl materials we’re using with our Cricut can no longer offer us new projects to do. Skip this section and click next if you say these craft materials, together with the tandem craft equipment you have, have already accomplished all the easiest and most difficult project ideas, making it no space for a new list of rising creations! Any hands now? Going once?... Going twice?... Of course, no one!
Raising a hand… Clicking the close option or skipping this page…Nobody will attempt to do any of these actions. Why? First, we’re all guilty of how much we irresistibly indulge ourselves in making DIYs and how DIY-ing never stops customizing items artistically! Second, we cannot hide that DIY making with our entire craft materials has boosted our capabilities beyond immeasurable! Lastly, ALL OF US ARE EXPECTING ANOTHER BOOSTER OF CRAFT, MAKING THAT FUEL UP OUR HOBBY, PASSION, and VENTURE!
Now let me ask you again. Would you shout a loud YES if I’ll tell you we’re going to have another excellent example of a creative task to make? Will you run and sit fast at your working table if I’ll show you how to do this creative task I’m telling you? If it’s a flashing “GO,” then come on! Let’s do it with a total explosion of energy!
Magnets, Vinyl Materials, and Cricut: Electrifying Crafted Inspiration?
If you’re like me, who’s been doing DIY-ing for the longest time, or if you’re someone who stands firmly on becoming a total pledge DIY enthusiast, would you believe there’s still one project you thought you had already done but had slipped off from your sharp without you noticing it? As I’m about to reveal this mysterious inspiration for our today’s crafting, I bet you’ll be left saying, “Why I didn’t know that?” and “Why it’s so late that I discovered that!”
A new medium that’s super easy to decorate with or without heat press machines is finally here… A contemporary art combined with Cricut’s excellent print and cut feature forming an unexpected product is about to exert a pull in making super fabulous crafts to customization! The DO-IT-YOURSELF FRIDGE MAGNET with vinyl Materials and Cricut! From the undiscovered to be made known, it’s now more than ready to attract charges of stirring and exciting design schemes! It’s unstoppable in magnetizing excellent artistic results for you and everyone! You cannot miss the chance this time, so be sure and be quick to listen!
Making DIYs on Magnets using Vinyl Materials and Cricut: Is it for Real?
Yes, we’re in for a real treat! This is why we love everything about DIY-ing, for it’s so great we can generate more thrilling pieces! As you see, it’s not a dream or imagination. We can create several DIYs with a magnet, one of which is by making customized fridge magnets with various designs.
Magnets combined with vinyl materials and work with Cricut, can solve most of your household problems, especially in your kitchen. These magnets we have merely known to exist from our simplest to most complex household devices, even if they come in small or bigger sizes, different shapes, or forms of sheets.
With its newfound meaning of usefulness with a purpose of aesthetic-ness, expect this to bring a vast jolt of changes making everyone’s life easier and craftier!
Why Customized Magnets with Vinyl Materials and Cricut?
If there are still “ifs” in yourself or you’re still pickled-minded about customizing a magnet for a fridge, let me give you more reasons to have faith in it. I’m very confident this will change your mind for the following reasons!
1. DIY fridge magnets are the handiest and the most straightforward project you could ever make! It’ll only take a few steps to create vibrant and high-quality items in a few minutes!
2. You’ll surely love making personalized magnets because there are many options for you to design one! You can customize a magnet using any of these techniques with a heat press or without a heat press!
3. Customizing magnets with vinyl materials and Cricut is the wisest project idea for you to make. Magnets, together with the variety of vinyl materials and Cricut, in just a few material requirements and a touch of clever hands, customize as many magnet projects as you can! It’s very cheap, and you don’t need to ransack both of your pockets to make an excellent piece.
4. Keep your to-do lists, postings, and reminders organized and synchronized! Decorating your DIY fridge magnets with attention-catching emojis or symbols guarantees that everybody in your household will gain 20/20 vision, 100% memory clarity, and won’t miss any announcements.
5. Do you know it isn’t only your living room that can tell many stories but even your kitchen with your refrigerator containing DIY magnets? Don’t just let your fridge freeze in one corner of your kitchen! It’s not just meant to stand there! Surprisingly your fridge can speak and tell lots of good old stories or memories by embellishing fridge magnets with vinyl materials using your Cricut. You can use your family photos, the image of your favorite places, or travel destinations as a decorative imprint!
6. Do you want to work in your kitchen peacefully and full of concentration even if your kiddos are around? If it’s a yes, you must have your magnets designed with the beautiful text of ABC and cute imprints of Peppa Pig or Angry Birds! If you customize your fridge magnets with these designs, for sure, they’ll enjoy playing along with these cutie magnets while you finish your work in the kitchen!
7. Getting crafty while maintaining practicality? Not a problem! Making DIY fridge a hobby or a business will shock you later, for it can double up your investment resulting from doubling profit!
What Decorative Materials can we use to Customize Fridge Magnets Completely?
Before we welcome some more plot twists and surprises that may take place in the actual customization process, we should get ourselves familiarized with what materials we need for this project. Take note, no need for you to hurry or take shortcuts to ease your excitement; this will not take us long. Just a bit more patience, and sooner we’ll get there!
By the way, by knowing these materials in customizing Fridge Magnets, later on, you get your first-hand knowledge to be more strengthened and make everything like a piece of cake when you’re already in the height of making your DIY Fridge Magnets.
1. Printable Vinyl
The Printable Vinyl is a beautiful craft material letting you design your DIY Fridge magnets without any exhaustion to difficult weeding, layering, or just for you to obtain every small or complicated detail of your designs. Like with Heat Transfer Vinyl, it lets you print your design in clear and colorful imprint using an inkjet printer and your favorite craft plotter like Cricut. The only difference between it and HTV is; heat and pressure are not needed for this application.
2. Sublimation Paper
Printing design on sublimation papers in multiple and full colors of imprints will be a satisfying deal and worthy of appearing for your project! This Sublimation Paper is another option of specialist craft material, giving your layout a brighter story for your image to tell. This material is exclusively used for sublimating imprints with glamorous digital quality like photographs. The unique thing about it compared to printable vinyl, it’s applied using heat plus pressure and can be both available for projects that are light or dark in color. This also allows you to have a closer to the original design look of your imprint with excellent, durable, and long-lasting quality.
For you to DIY and sublimate on your Fridge Magnets, the first thing you should secure and consider is that your printer and substrate must be compatible for this process. Your printer must contain ink capable of sublimating, and your substrate must be a blank magnet coated with poly-base material or simply a sublimable blank magnet.
3. Printable Magnetic Sheets
The Printable Magnetic Sheet is the freshest and one of the latest craft materials you can use with this customization. It’s a versatile and printable craft sheet with built-in magnets, enabling the design generation’s rich color. It’s manually cuttable without difficulty with the help of your cutting machine.
4. Laminating Film
The Laminating film is a material that seals your output for finality and is compatible with all vinyl. It’s a transparent, glossy material we can use to safeguard any of your projects printed using inkjet ink against moisture, splashes of water, scratches, and fading of design colors.
How do we Customize Fridge Magnets?
In whatever projects we create, we always take our best steps to make them materialize, and we’re lucky enough to experience the most high-tech way of customizing our craft. The same crafting experience beyond expectation will happen with us again, but this time with our DIY Fridge Magnets! What’s better and best?
The Print, Cut, and Calibration Feature of Cricut
When it comes to the process of Fridge Magnet Customization, always making our lives swift and easy is the ultimate print and cut feature of Cricut. This feature replaces our need to cut our design using our hands. Instead, it will electronically cut our images in any craft materials where our design is imprinted. Most of the time, if we DIY a magnet, this feature is where our process of craft making always revolves.
In addition, the print and calibration it has, an essential step in making designs for DIY fridge magnets, is not only a bonus, but it’s beyond luck of our comfort. Before we place our printed designs on our substrates, this function always ensures to perform the best and most accurate cut to whatever image we have. As a result, we don’t need to always wait in worry about what outcome we will have after printing and cutting.
Discover More Great Articles On Crafting
Other vinyl projects you might want to try, please click the links below:
ADHESIVE VINYL CRAFT IDEAS
The Different Techniques to Apply Customized Designs of DIY Fridge Magnets
Look where we are now! I can’t believe within a blink of an eye, we are all gathered now to witness what techniques we could apply for today’s customization. I told you everything would be just quick for us, and good thing we didn’t go into haste.
Since we’re now all equipped with all the knowledge about DIY Fridge Magnets and other materials it needs, it’s about time to get a first-hand experience of how we could do this.
Buckle up! And get ready to embrace twists and turns bringing fascination to our do-it-yourself Fridge Magnets!
-
Customizing Fridge Magnets without a Heat Press
No Heat Press Machine? No Iron-on or Easy Press Machine? Not a problem! Customizing Fridge magnets are still possible and doable even without your heat printing tools.
As we took a brief look at the decorative materials for DIY-ing Fridge Magnets, this is where Printable Vinyl and Printable Magnetic Sheets apply. No heat press DIY Fridge Magnets are achievable without stress through these two craft materials. As long as you have your Cricut Cutting Machine with its Print and Cut Feature, you will accomplish everything finely, do everything correctly, and complete it on time! And yes!
Method 1: Customizing Fridge Magnets using Printable Magnetic Sheets
In Customizing Fridge Magnets using Printable Magnetic Sheets, we’ll directly print our image just the same as we print images the usual way with our printer. Then, after all the cutting, you can stick your DIY magnets on your fridge.
Step by Step Process on Customizing Fridge using Printable Magnetic Sheets
Materials:
- Printable Magnetic Sheet or Printable Vinyl
- Cricut Cutting Machine with Fine Point Blade (Except Cricut Joy)
- Cricut Strong Grip Mat
- Inkjet Printer
- Brayer
- Laminating Sheet
Step 1: Select or download your print and cut file on your computer, then import it to your design space. Ensure the print and cut files are in PNG format and complex image type.
Step 2: Upload the file by selecting the Print then Cut option and then add it to your canvas.
Step 3: To print then cut your file on a Printable Magnetic Sheet; make sure to adjust your image according to Cricut’s recommended image size and paper size.
For the cut setup:
- The image shouldn’t exceed the limit size of the Cricut machine, which is 6.75 inches by 9.5 inches. By following this suggested limit size, you may choose what Cricut Machine you are using and select “make it” to cut the image.
- If your image surpasses the said limit, click and drag the bounding box to resize the image all at once, then lock it.
- Don’t forget to tag the “bleed option” on the printer setup. Doing this will let you get the best cut on Cricut Machine once all are finalized.
For the Print Set up:
- Make sure the paper size of your material should be 8.5 inches by 11 inches.
- If there are no adjustments to make, proceed to the print setup and select the printer you will use for printing.
- Tag along Use System Dialogue to obtain the excellent print. Click print to generate your image on your inkjet printer.
Step 5: After all the printing and cutting, laminate the finished product using the laminating sheet to add an extra layer of protection on your imprint against moisture, splashes of water, and scratches. Remove the excess laminating sheet by cutting it manually.
Method 2: Customizing Fridge Magnets using Printable Vinyl
For this method, the printing and cutting process of your design using Printable Vinyl is just the same experience in doing the procedure for customizing Fridge Magnets with Printable Magnetic Sheets. The only difference in this method, a Printable Vinyl has no built-in magnetic sheet on its backing, so we need a separate adhesive magnetic sheet to be affixed later on to the finished output.
Materials:
- Printable Vinyl
- Adhesive Magnetic Sheet
- Cricut Cutting Machine with Fine or Deep Point Blade (Except Cricut Joy)
- Cricut Strong Grip Mat
- Inkjet Printer
- Brayer
- Lamination Sheet
Step by Step Process on Customizing Fridge Magnets using Printable Vinyl
There are two ways to print and cut all the materials in this process, so let me walk you through it.
#1. Printing of Printable Vinyl then Cutting with Adhesive Magnetic Sheet, and Laminating Sheet all at Once
- To do this way, print first your image on an inkjet printer using the Printable Vinyl by following the similar printing process found in method 1.
- After printing, attach the vinyl to the adhesive side of the Adhesive Magnetic Sheet and place it on top of the laminating sheet of the printed surface.
- Once all are attached, follow the cutting process you did, similar to method 1. Then see your Cricut cut all the materials combine at a single time.
#2. Printing then Cutting of Printable Vinyl and Cutting Separately of Adhesive Magnetic Sheet and Laminating Sheet
- For this procedure, the Printable Vinyl, Adhesive Magnetic Sheet, and Laminating Sheet shall undergo the separate process of cutting.
- Cut your Printable Vinyl first by following the steps in Method 1 but take note of step no.3; you should duplicate your image. The colored layer of the copied image is used for Printable Vinyl when printing and then cutting. In contrast, the other copied image in grayscale or no fill layer is to accomplish the cutting process for the Adhesive Magnetic Sheets later.
- Once the printed image on the Printable Vinyl and the shadowed shape of the image on the Adhesive Magnetic Sheet has also been cut; you may assemble them by carefully aligning and adhering the printed image in the Printable Vinyl on the adhesive side of the magnetic sheet.
- Secure the assembled item with laminating sheet and cut out the excess part using scissors.
Important note:
Make sure to load your Printable Magnetic Sheet and Printable Vinyl correctly on the printer’s tray and cutting mat. Remember both the magnetic side of the Printable Magnetic Sheet and the adhesive side of the Printable Vinyl should be placed face down on the printer’s tray and the cutting mat. In contrast, the customizable side goes facing up when it’s fed on the printer and facing up the Cricut’s Blade.
Customizing Fridge Magnets using Heat Press Machine
Can you heat press magnets? I suppose this following technique of Customizing Fridge Magnets proved that DIY-ing magnets could be pressed with a Heat Press! Since we involve the customization of magnets using the method of sublimation in this process, it’s a requirement for you to heat press your design. Moreover, your design creation will not just be limited to simple images, but you could have photographic designs to place on your magnet’s surface.
Method 3: Customizing Fridge Magnets using Sublimation and Heat Press
Materials:
- Sublimable Fridge Magnets (MDF Magnet pieces)
- Sublimation Paper
- Heat Tape
- Sublimation Printer
- Heat Press Machine
- Heat Press Pillow (Optional)
- Heat Protection Cover Sheets
Step by Step Process on Customizing Fridge using Sublimation and Heat Press
1. On your computer, choose the design you’ll use for sublimation and size it matched with the size of your sublimable magnet blanks.
2. Print the image on the sublimation paper using the sublimation printer.
3. Once the image is dry, place the coated side of the sublimable magnets facing down the imprint and secure them all with heat tape to avoid movements when pressing.
4. Place a heat protection cover sheet on the top of the sublimation paper to protect the image and the substrate.
5. Start pressing for about 380 °F to 390°F in temperature in about 70 seconds to 1 minute and 30 seconds with firm pressure.
6. Let the finished item cool down a bit, remove the blank magnets one by one on the sublimation paper, and finally, attach the magnets to the back of the finished output.
Raise the hand of all the people who have learned a lot today! One, two, three, and more… That’s great! This crafty time is another fruitful time we share today, and now I can’t wait to see those awesomely pretty magnets in your kitchen the next time you ask me to come over to your house. Thank you so much for being with me on this journey! See you again next time!
Learn more Vinyl tips and tricks and share your crafting adventures with us. Please visit us on our pages.
Social Media Accounts:
FB: CraftVinyl.ca
IG: CraftVinyl.ca
TikTok: craftvinyl.ca
For your vinyl crafting needs, please check our website at www.craftvinyl.ca. We offer different Adhesive and Heat Transfer Vinyl, perfect for your next project.


