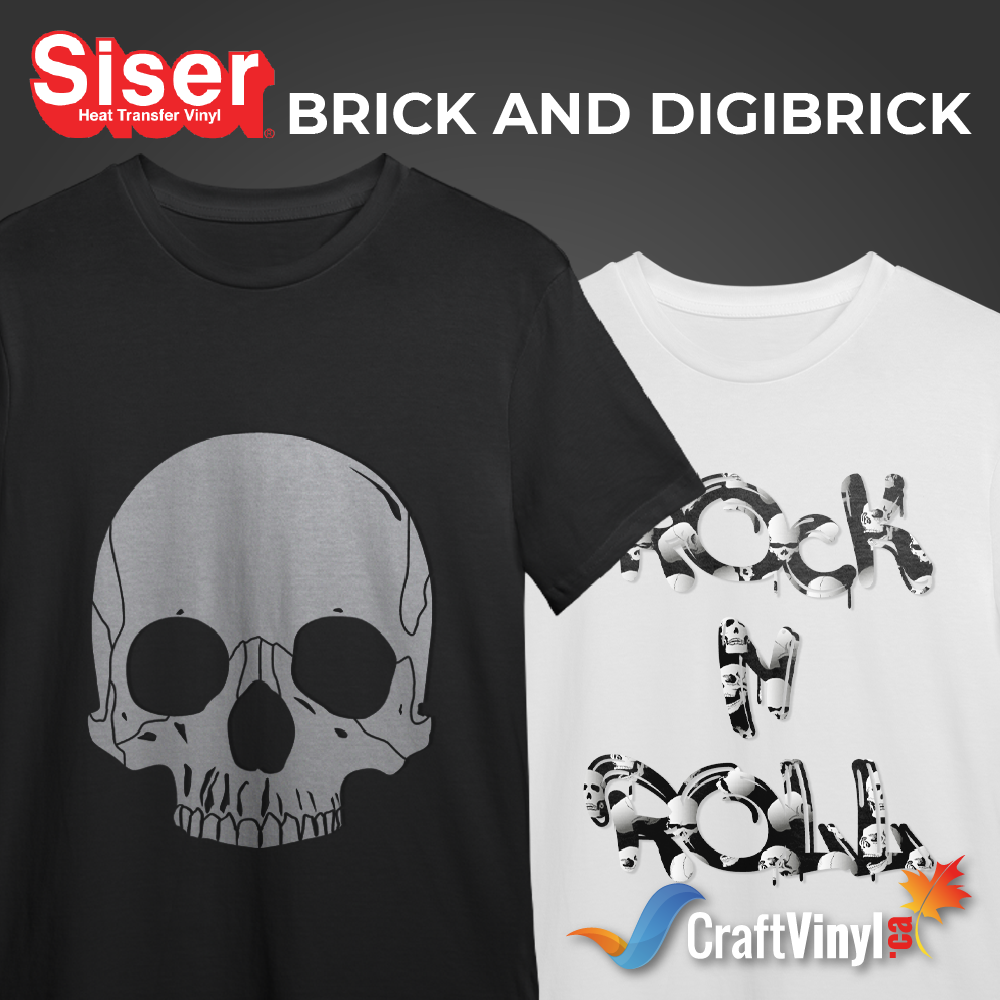
WHAT ARE SISER BRICK 600 AND SISER BRICK 1000?
Thin or thick, materials of all sizes have a place in garment decorating with the help of Heat Transfer Vinyl. Even the simplest shirt you have on hand could turn into something special after adhering to some types of vinyl. Since you know how to utilize standard vinyl, printable vinyl, and pattern vinyl, the excellent kind of HTV I'm about to introduce will give you more motivation to do DIY vinyl projects.
I am not boasting, but this will give you an embossed texture!
I am talking about Siser Brick Vinyl, notably Siser Brick 600 and Siser Brick 1000.
Are you getting curious about these two Siser's craft materials? Keep on diving and learn more!
Not everyone is looking for the thinnest materials available. Sometimes a design calls for thicker material. The next time you think your design might need a height boost, think about adding some depth with Brick 600 and 1000 by Siser!
Product Overview
A brand-new, premium polyurethane substance with adhesive backing is called Siser Brick. It was created for textile thermo transfer. Despite its exceptional thickness, the material allows for simple cutting, weeding, and application and has good washing resistance. The substance is ideal for both small and large applications. Siser Brick does not break or rib even after numerous washing, unlike other textile types of vinyl.
Brick 600 Heat Transfer Vinyl
Brick 600 HTV is a flexible, 600-micron thick heat transfer vinyl made by Siser that is intended for smaller logos and graphics to give your outfits more dimension. It has a very thick PU plotter cut material with polyester backing. EasyWeed Stretch is applied over the base layer to create a tremendous embossed appearance. The matte appearance of Brick 600 looks terrific on hats and backpacks and is perfect for left chest logos. All across the world, sports apparel can be found with this stylish appearance.
Brick 1000 Heat Transfer Vinyl
On the other hand, when we say Brick 1000, it is 1000 microns (1mm) thick, meaning it's over ten times as thick as EasyWeed! Crafters are delighted about the numerous design options due to this material's remarkable originality and versatility. They aim to use Brick 1000 to embellish a variety of items.
Super quick and easy! The process for applying is the same. The thickness is the only distinction between Siser Brick 600 and Brick 1000.
Siser Brick is suitable for cotton and polyester textiles, Lycra, and blends of these materials. It is not ideal for treated and dye sublimation fabrics.
HOW DO YOU CUT A SISER BRICK WITH A CRICUT?
After making your design on your Cricut Design Space, all you have to do now is to cut it and have your design on hand. We will use Cricut to cut your Siser Brick perfectly! Remember, measure your medium first and resize your design accordingly.
Just follow these simple steps on cutting your design with proper Cricut settings.
So first, you still put your Brick vinyl shiny side down on the mat. You can run a brayer over it to ensure it is well laid down. Find the glitter iron-on settings on your Cricut cutting machine settings, as it works pretty well. You might try card stock setting, but it is very thick. But if you find that card stock setting works best for you, that's fine. Click All Materials, and pick glare iron-on. That's the one that works best.
Now we'll load our mat with brick vinyl into the machine. This cuts with just the fine-point blade. And then press "Go" to cut. Once done, we'll unload the mat from the machine.
Here are some cutting machine settings you can follow if you don't have Cricut.
Cutter Settings
Cricut:
Blade: Standard
Setting: Cardstock Light+
Silhouette Cameo:
Blade: Standard, 10
Material: Heat Transfer, Flocked
Speed: 4
Force: 33
Scan N Cut:
Blade: Standard, 10
Cut Speed: 1
Cut Pressure: 2
Roland GS/GX-24:
Blade: 60°*
Gram Force: 150-190
Offset: .250
Speed: 30 cm/s
Graphtec:
Blade: 60°*
Gram Force: 11-12
Tool: CB09U+0
Speed: 25 cm/s
MH, SC2, LP3, and Titan 1:
Blade: 45°/60°
Gram Force: 120-130
Speed: 300mm/s
*Blade Advancing Varies
Titan 2 & 3:
Blade: 45°/60°
Gram Force: 100-110
Speed: 300mm/s
*Blade Advancing Varies
Settings may vary based on blade condition and the age of the machine. Always perform a test cut before cutting designs.
I hope you find your cut settings for your brick vinyl!
CAN YOU LAYER ON TOP SISER BRICK?
Siser Brick 600 and Siser Brick 1000 can be layered on top of other heat transfer vinyl but not UNDERNEATH!
I love learning new things every day! So now we will layering using the Regular Vinyl and Brick Vinyl for a 3D Effect!
First things first, you had to come up with a design.
For the Base or First Layer:
I created a simple logo using brick vinyl with regular vinyl as its background.
Making a round shape for a logo using regular vinyl is soooo easy! But, let me remind you once again that the size matter. Measure your medium first to ensure that it will fit. Now on your design space, make a circle and send it to your Cricut cutting machine.
Now, adhere it first to the upper left side of your shirt using the easy press. Press it at 305 degrees Fahrenheit with parchment paper or a Teflon sheet above for three-five seconds. Set it in the highest or cotton setting and press to the first layer for five seconds. Since it is just a small design, you can use a home iron.
For the Second or Top Layer:
After applying the first layer, let your shirt cool down for a few seconds.
Now, create the second layer of your design using the Brick Vinyl on your Design Space. Make it smaller than the second layer. MAKE SURE YOU MIRROR IT! We all forget to do this step from time to time, but make sure you see your image reverse on your screen before you cut.
After cutting and weeding out the second design, it's time to layer it on your regular vinyl. Press it at 310°F or 155°C, and we will have a medium pressure set to our press. You can also use your home iron in cotton settings and press it for about five seconds with parchment paper. To ensure that it properly adheres, flip your shirt outside and press it using your easy press or home iron for another five seconds.
And there you have it!
Your embossed logo is now ready! This one is perfect for the school logo and business logo.
Discover More Great Articles On Crafting
Here are other vinyl products you might want to try for your next project. Please click the links below:
HEAT TRANSFER VINYL VS. PRINTABLE HTV
WHAT IS SISER DIGIBRICK HTV AND HOW TO APPLY IT?
Ever wanted your HTV vinyl to be noticeable on a project? If so, this might be the thing you've been looking for. Today we will use Siser DigiBrick HTV. Print on a brick vinyl which is 6–8 times thicker than conventional HTV, to provide the eye-catching detail you want. Add dimensions and pop to your design with its 750 microns thickness. So ensure that your cutter blade is in good condition.
In addition, this three-dimensional effect digital media brick vinyl is printable with solvent, eco-solvent, and UV-based inks large printers only.
Most heat transfer vinyl users are constantly searching for the thinnest material for their customization. In Siser, with one of their latest vinyl, they decided to go against the mainstream. They went thicker and bolder with this one. The brick material is not rough at all; it is as smooth as EasyWeed. Therefore, utilizing Brick to customize a hat, shirt, bag, pair of shoes, or anything else will give your design a fantastic 3D or elevated appearance.
Now I will show you the whole application process for Siser Digibrick.
Step 1: Choose and print your preferred design.
This is quite important for you because the design of your HTV undoubtedly adds beauty to your medium. You can create your design or choose and download it from various ready-made options. It's up to you!
Note: Siser Digibrick vinyl is recommended for eco-solvent or solvent large format printers.
Step 2: Mirror your design before sending it to your cutting machine.
So say, "I will mirror my image before cutting." Don't forget that thing!
Step3: Load your Brick Vinyl on the cutting mat. Follow the Cricut settings I mentioned earlier.
This is a static backing. You want to make sure your cut is good because, with Brick, it is not a pressure-sensitive backing like EasyWeed. If you have a lot of details on your design, double-check if it cuts well so you do not have any lifting. It's best to perform several test cuts to find the perfect cobination.
Step 4: Weed out your designed Brick Vinyl
Weeding is the process of removing all the extra material. To remove it precisely and prevent ripping of your design, use tweezers. Brick HTV vinyl is incredibly flexible. Not as elastic as you may imagine. The backing is static. While some vinyl may lift slightly during the application, this is acceptable because it will eventually settle back down.
Step 5: Now we are on to the best application portion...
Take out the wrinkles of your shirt and moisture for 2-3 seconds. We will set our heat press up to 310°F or 155°C, and then we will put medium pressure on our press. You don't want to go too firm because of the thickness of this material. Mid-pressure is enough. You can use heat tape to keep it down if you want to use heat tape. Put parchment paper or Teflon sheet over the brick vinyl.
I advise that you apply the remaining 15 seconds to the back of the garment, hitting the adhesive directly, after using the first 5 seconds to the top to tack it down.
This isn't fully applied. We're going to flip our shirts inside out. This is going to apply for 15 seconds. The adhesive to the material is correctly curing in this manner. The Brick doesn't peel off heated. In reality, you want to hold off until it has thoroughly cooled.
You can also use Home Iron in applying Brick Vinyl. Just follow these settings
Heat Press Instructions
- Cover with Heat Transfer Cover Sheet or Multipurpose Paper
- Preheat garment for 2-3 seconds
- Apply design at 310°F/155°C
- Use medium pressure for 20 seconds
- Peel carrier cold
After making your Brick Vinyl project, consider this tip as you wash your shirt.
Laundering: Wait 24 hours before the first wash. Machine wash cold with mild detergent. Dry on standard dryer setting. Do not dry clean. A liquid fabric softener is not recommended.
Learn more Vinyl tips and tricks and share your crafting adventures with us. Please visit us on our pages.
Social Media Accounts:
FB: CraftVinyl.ca
IG: CraftVinyl.ca
TikTok: craftvinyl.ca
For your vinyl crafting needs, please check our website at www.craftvinyl.ca. We offer different Adhesive and Heat Transfer Vinyl, perfect for your next project.


