Heat Transfer Vinyl vs. Printable HTV:
An Easy-to-Understand Guide for Beginners
Creating customized Heat Transfer Vinyl projects is a beautiful way to satisfy our creative desires. That's a statement we all can agree on! The mere thought of the many things you can do is already a thrill that puts bliss in our sometimes weary souls.
But that's not the only reason that makes vinyl a top fave among legions of our crafty subscribers! What brands it as an even more exciting artistic outlet is the variety of fashions one can opt to do things. From simple, beginner-friendly vinyl projects to intricate designs and concepts, one can easily pull it off, all thanks to a good deal of materials to choose from.
That's right! You've read it correctly. The vinyl world offers not just one but a series of materials to use. And for today, you're in for a treat, for we're dedicating today's blog to learning two of the hottest vinyl out in the market now - regular heat transfer vinyl (HTV) and printable HTV!
What is the difference between HTV and printable HTV?
Are you also a victim of confusingly identifying the two as the same product? Come on! Please don't be shy about it. I, too, couldn't tell the difference when I was at the beginning of my arts and crafts journey. But not until I've tried both vinyl materials that I finally learn what's unique about each of them. So, I am sharing with you what I've discovered.
Heat transfer Vinyl and Printable HTV share the same family. Both are equipped with a heat-activated adhesive film that works when heat-pressed. And ultimately, they exist for a similar reason - to empower us to customize almost anything we want. But despite this clear-cut alikeness, a defining distinction sets one from the other.
By definition:
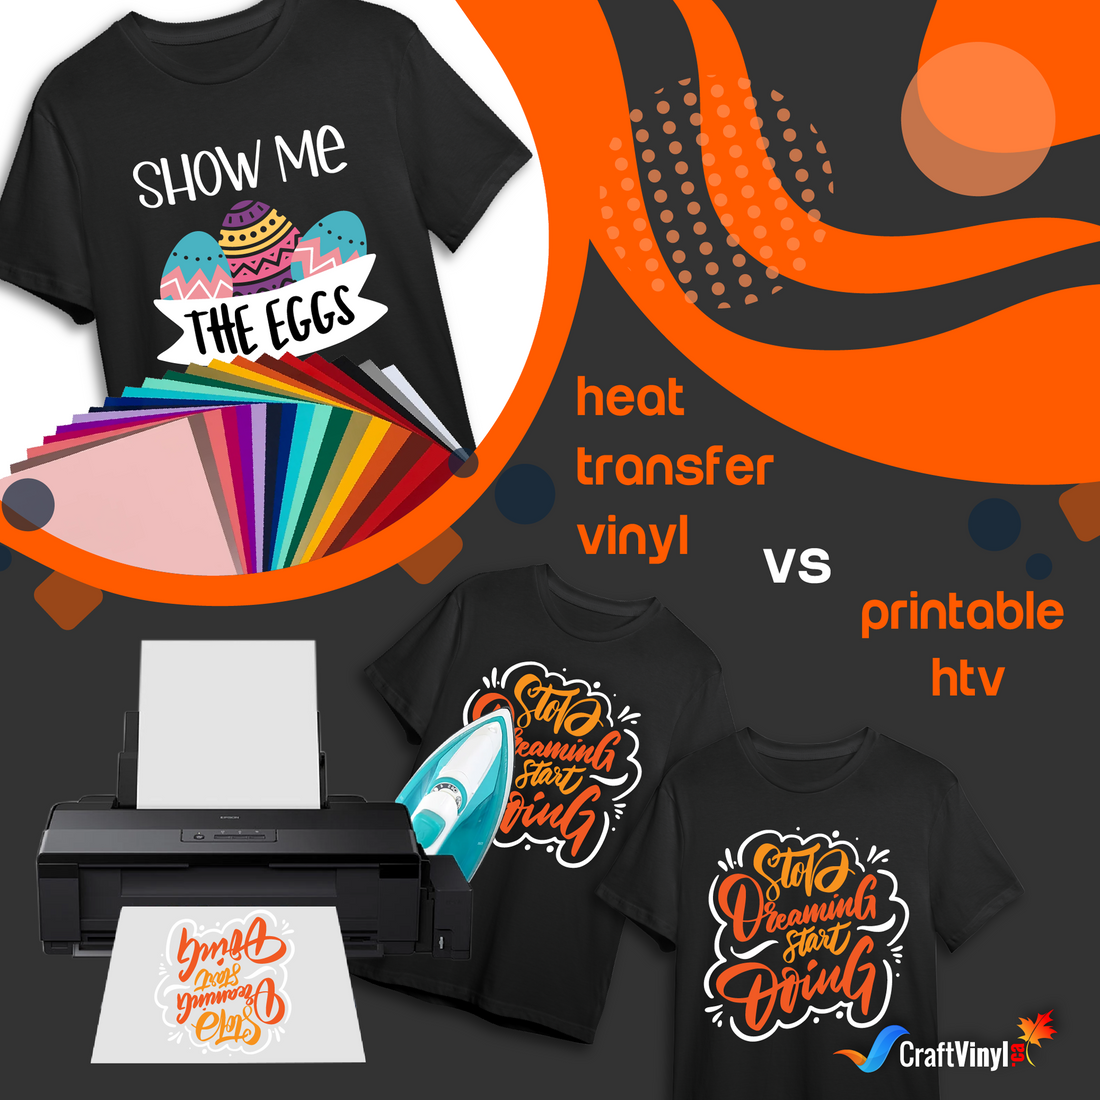
Heat Transfer Vinyl is a form that allows you to permanently apply personalized graphics to various substrates using a heating tool such as a heat press or home iron. Meanwhile, printable HTV is a type of permanent vinyl that you can print on using a commercial-grade or home-ready inkjet printer.
In the simplest explanation, both offer a dependable solution for creating creative vinyl decals, but printable HTV provides a different level of ease when making multicolored graphics.
Heat transfer vinyl is a time-proven solution for many of our DIY customization projects, but as you can see, making a multicolored image is quite laborious. This process involves layering every color and every piece of the design until you complete the form of the entire image, not to mention that it goes with the risk of the substrate getting scorch marks or the vinyl itself getting burned.
This is where printable HTV comes in handy. While a common HTV is perfect for simple and unicolored designs, a printable HTV can offer a splash of vivid and crisp imagery on our fave shirts. It's the ideal product for creating and transferring intricate and high-resolution graphics without a sweat.
Nope! Making a design into a high-quality decal is as easy as printing images on a piece of paper. You won't need to spend more time and effort layering different HTVs just for one vibrantly colored design.
Check this out:
If you think HTV is just the lesser stellar sister of printable HTV, then check this out.
If printed HTV gives us an easy and convenient way of transferring multicolored designs, then regular heat transfer vinyl can proudly flex its variety of finishes and textures. From the sparkly glitter, holographic and metallic shade to reflective and glow-in-the-dark variants to the puffed-up look of Puff Vinyl to the suede-like and velvety texture of Flock HTV, you'll be amazed at the overwhelming choices HTV has to offer.
Since Printable HTV focuses on delivering colorful graphics, you'll have no flexible options like the one above. You only have two selections: one for light materials and another for dark-colored materials. Printable HTV for lightweight materials is best for light-colored fabrics, from white to lighter pastel colors. Meanwhile, Printable HTV for Dark Materials is perfect for dark-hued garments covering black to an entire pallet of dark pastel color. Note that such choices are solely based on the color of the material you're working on and not necessarily on your aesthetic preference.
Can you print on HTV with an inkjet printer?
As we all know, printable HTV is designed for specific use with inkjet printers and, to the exception of some, with laser printers too. But how about regular HTV? There's a common misconception among crafty folks that you can print on regular HTV, but sadly you can't. Heat transfer vinyl is not compatible with either inkjet or laser jet printers. Instead, HTV uses a vinyl cutter to print or cut digitally designed graphics into the vinyl.
How to use printable HTV?
Another notable difference that sets printable HTV apart from regular HTV lies in the preparation. So before diving in head first, you might want to take a quick read on these universal printing tips:
- An inkjet printer is a must! Printable HTV is nothing without a compatible printer, so you must ensure yours is an inkjet type and not a laser type printer.
- Different versions of Printable HTV have their specific instructions. What applies to the other won't work on the other. A glance at the step-by-step direction can permanently save you from the stress caused by a faulty application.
Now that you're acquainted with some necessary bits of information. Immerse yourself in these steps and discover how to create standout designs with printable HTV.
1. Designing the Graphic
The first step is to design your decal or buy a ready-to-print graphic. No design software? Newbie crafters have one less thing to worry about because most vinyl cutter comes with free vinyl cutting software that allows you to make your design.
During this process, you have the liberty to adjust the color setting to your preferred saturation and brightness, among others. You also need to scale the image to your planned size. And lastly, it's essential to check if you need to mirror your design or not.
2. Printing the File
After successfully creating a design, the next step is to print the file. To do this, load the Printable HTV on the printer where the vinyl side is facing up. Before printing, I suggest you adjust the image quality to the maximum to have a clear and crisp printout. Let the ink dry out first before proceeding to the next step.
3. Cutting the Printed File
When cutting the printed design, you have the option to cut it manually using a pair of scissors. But for some who want precision and neat result, you can mechanically cut the graphic using your vinyl cutter.
Load the vinyl sheet on the cutting mat with the printed design facing up. Prepare the cutting machine and adjust it to the Printable Vinyl setting for the best result.
4. Weeding
After cutting, weed out the excess vinyl pieces.
5. Transferring your Design
The next part brings you to the moment of pressing the image on your chosen substrate.
For mirrored design, put the image facing down and let the back side faces up this time.
For a non-mirrored design, apply a heat transfer mask on top and peel off the original backing sheet. After adding a heat transfer mask, place the image on the substrate.
Set your heat press on the required temperature, time, and pressure setting. Add a Teflon sheet, then start heat pressing. Please wait for the heat press to do its magic, and you're on the final step.
6. Peeling off the backing sheet/heat transfer mask
For the final step, be mindful if the type of vinyl you've used requires a cold or hot peel. This final touch is crucial to your success, as untimely peeling can damage the graphic. Hot peel means removing the plastic sheet right after pressing. In contrast, cold peel requires the vinyl to cool down first before peeling off the plastic sheet. Once done, you've accomplished the job. You've customized something with a vibrantly colored graphic!
Discover More Great Articles On Crafting
To learn more about Heat Transfer Vinyl; please click the links below:
DIFFERENT TYPES OF HEAT TRANSFER VINYL
Can you put printable vinyl on a shirt?
Yes! Yes! Oh yes, you can!
Printable HTV is perfectly applicable on shirts and other garments. Whether you want to put your dog's cute smile on your sweatshirt or a business logo for souvenir T-shirts, you'll have nothing but joy as all these and more is 100% doable.
Can you wash printable HTV?
What's good about printable HTV is that it's not a one-time used vinyl decal. Once heat pressed on shirts, the graphic won't easily peel off even if you wash. Depending on the product's quality itself and external factors such as your way of handling and caring for it, printable HTV can survive even up to 50 washes.
To enjoy your creative creations for a long time, follow these washing care tips.
- Before washing, turn the shirt inside out to save it from rubbing against other shirts while being washed.
- Avoid using warm water as the hot temperature can cause peeling or cracking of the vinyl.
- Only use mild detergents and avoid soaking it under bleached water. Bleach may contain chemicals that can weaken the vinyl's adhesive.
- Avoid exposing the shirt too on extreme heat when drying. Best if you let it dry on low heat.
These are tried-and-tested solutions for keeping printable heat transfer vinyl in good condition. With proper care, the graphic may stay there even longer.
Both regular HTV and printable HTV redefine what it means to have fun while channeling your creative soul. They offer an experience that makes them a good value for money and a worthwhile hobby to spend your precious time with. So go on, don't hold yourself from unlocking a new bundle of happiness. Treat yourself today and buy a roll of printable HTV.
Don'tforget to share your crafting adventures with us. Please visit us on our pages.
Social Media Accounts:
FB: CraftVinyl.ca
IG: CraftVinyl.ca
TikTok: craftvinyl.ca
For your vinyl crafting needs, please check our website at www.craftvinyl.ca. We offer different Adhesive and Heat Transfer Vinyl, perfect for your next project.


