


Heat Transfer Vinyl on Hats
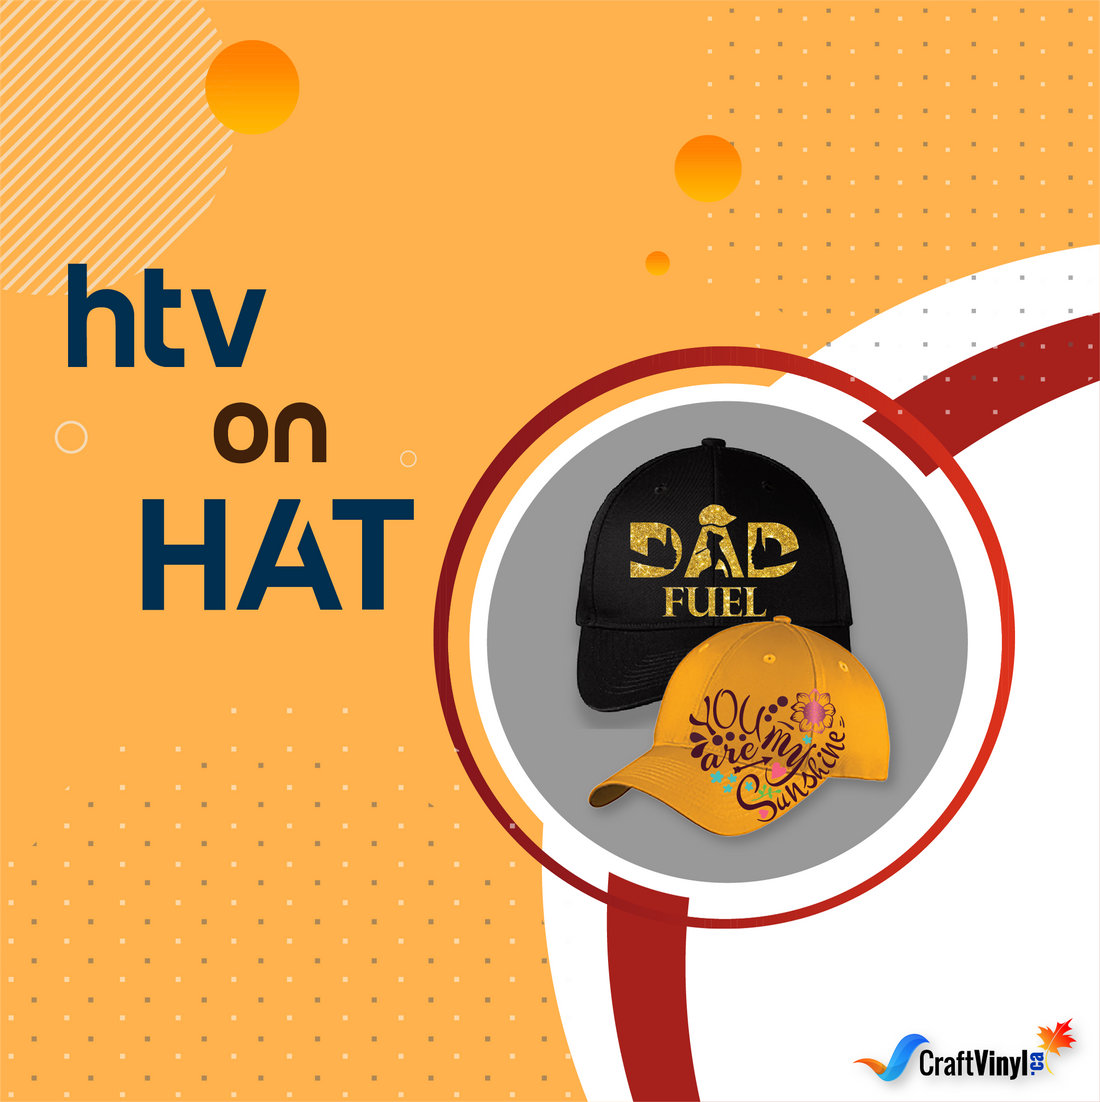
Headwear Series: Heat Transfer Vinyl on Hats
Hey, sunshine! Thanks for coming here unfailingly. Like you, I had lots of good times doing all-the-way craft projects with you. Here again, is another rapport for crafting plus a venture that's never been out of time. This is not a Deja vu or an accidental coincidence using Heat Transfer Vinyl again as a material.
What more do we look for? It's a rendezvous of Heat Transfer Vinyl! If you're thinking of HTV being for shirts or apparel only, it's not what you think; hence expect more! I'll tell you there is another must-try piece where you can use this vinyl material to slay and make your customer's fashionable style a complete package.
To know what we have prepared for you. There's only one way to do it. Get your feet steady, sit back, relax, and stay with us until we reveal this wonderful creation that will bring enormous business potential to you. Keep on crafting with us!
HTV on Hats: A One – of – a Kind Masterpiece for All-Season and Occasion
Do you get caught red-handed on this page because you want to create another noticeable and fashionable item out of your heat transfer vinyl? HEAT TRANSFER VINYL ON HATS is the one you've been chasing all along. No wonder this is a very brilliant idea for you to pursue.
Why get immersed in designing hats using HTV crafting? The most anticipated answers to your whys are listed below.
- Hats are universally wearable. Just like shirts or various clothing, it's a fashion accessory worn by anyone at any age, any time. Hats as a new medium for Heat Transfer Vinyl and a new product option can be a good profit magnet by increasing your HTV printing business sales. It enables selling to be consumer-focused.
2. In fashion terms, hats can flow with the current of the latest fashion trend, and even if seasons change, they don't stop evolving. It's a timeless fashion accessory that's always part of foretelling and determining future trends.
3. In the business world, Heat Transfer Vinyl is a considerably friendly vinyl material budget suitable for a startup. Likewise, hats are less costly items to purchase for an investment. Mixing hats with HTV designing allows you to print any image, create your logo or personalize patches and convert it into your brand with minimal effort. Then if it possibly catches the public's eye and thirst for a sense of fashion, it's a great alternative to be a source of living, whether retail sale or online.
4 . Embroidery is the most popular way of printing designs on the hat we know; however, it takes time and may be costly. Heat printing using HTV on hats is a great alternative with an easy process and a cheaper cost.
5 . If you're a hobbyist or love to customize your fashion style, hats as an everyday piece of people's attire are not just for head coverings but can be an outlet of an art form and design customization using HTV.
6. Heat Transfer Vinyl easily adheres to your hats using a heat press. Let's say a customer is delighted with your product and asks for different hats, and it'll not cost you so much time. No more, no less.
It's implausible that while adding a twist to HTV, hats will never die as a trendy accessory for all. An ace upon your sleeve is an endless choice that'll come and feed your inspiration for creativeness.
Hats on! A Must-Know Information on Hat Decoration using HTV
The increase in demand empowers a lot of expansion for hats to take and continues to become a signature accessory for some folks. Today, before we plunge into the primary process of Heat Transfer Vinyl application on hats, let's thrive more on the critical information that will equip and prepare you better.
.
Understanding the Anatomy of Hat for HTV Application
Hats are covered for the head, usually with or without a brim. This hat's structure makes us realize that sticking HTV on caps is quite different on fabrics or shirts due to surface differences. There are 34 different types of hats worn throughout history and are still worn today. So before deciding what vinyl material you'll be using, determine what type of hats you want to decorate. Since hats or caps are not designed as a flat piece of textile similar to an ideal variety of caps or hats that are ordinarily curvaceous in shape and have a firm surface, printing won't be easy. With this, you can adjust in advance a good strategy that will work on your chosen type of hat and HTV.
Almost any hat can be decorated. In addition, here is the list of hats or caps widely used for HTV printing.
Understanding the Temperature Requirement for Pressing HTV on Hats
It's pretty ironic that even if we apply Heat Transfer Vinyl using heat on your hats or caps, both your vinyl material and medium won't enjoy tormenting heat. Regardless of your hat type, getting the right amount of heat, pressure, and time will be the key to a safe HTV application. When attaching design to your medium's surface, it's generally recommended to set your hot tool based on the heat setting or specs prescribed by the manufacturer of the HTV brand.
For standard HTV like Easyweed, the settings are about 305 °F for 20 seconds, medium to firm pressure. While for Specialty HTV like glitter or Flock HTV, the heat setting is about 320°F with a time requirement of 20 seconds comes with a medium to firm pressure. Fabric and canvas hats may stand the heat, but hats such as straw hats are a bit heat sensitive. Once you apply heat, it may affect the shape . Enough curing time is essential for HTV to bond fully with the medium's surface. Less stress on your medium's surface is lessening, and the vinyl material will lead to a higher quality finish.
Understanding Keys to Make HTV Imprint Lasts on Hats
On looker's attention, it's where people's attention draws first. If you want to get noticed, then get a hat! Hats as headgear add a little spice, character, or sophistication to your outfit and personality. Perhaps, designing your headwear with HTV is inexpensive and easy to apply. However, if wearable accessories come with a bit of peeling or cracking, it can damage the overall look and impression of a good design. HTV on hats, same with fabrics or apparel, with proper care and handling, can last for years.
Meanwhile, here are some helpful tips to make the life span of HTV design longer on your hat.
- Avoiding excessive heat after HTV application and cleaning hats with HTV imprints using cold water prevents the loosening of the vinyl's adhesive.
- Hats made of fabric may withstand water pressure only when doing gentle hand washing.
- When drying your hats, let them air dry. Avoid using a hairdryer or dryer for clothes, for it may be a source of unwanted heat or distress to your design.
- Inadequacy of time for HTV to sit on your medium's surface interrupts the succession of its bonding. It will lead to design cracking and flaking.
- If you want to remove dust on your hat, use a soft-bristled brush or the type of brush applicable to the kind of hat you need to clean. An inappropriate brush for your hat will likely scratch out the hat's actual design and surface, causing damage or shredding off.
- Avoid crumpling or crashing your hat. Mostly, hat owners are not careful with this kind of habit of handling caps. Once hats are repeatedly squished, the same thing will happen to the design. It will cause dents or flaws to start to arise.
- Bleaching hats or using cleaning chemicals on your wearable accessory will start severe damage to your HTV as it may be prone to discoloration and peeling.
- If you bump into an unexpected weather change such as rain, avoid your hats getting wet. If it's unavoidable, wobble off as excess water as possible because letting the HTV soaked with water can make your design less intact for a longer time.
Now, with every background detail you've hovered, you're ready and equipped to step into action. This time why not print designs on hats? Showcase your craftiness with styles that are countless and overflowing.
The Ladder to Success: Methods to Transfer HTV design on Hats
Different methods of Heat Transfer Vinyl application, courtesy of your reliable hot tools, offer adventurist ways to transfer HTV designs on hats. Hot tools can always help you find a good fit for the unique needs of hats you'll be designing. As we consider the popular options for HTV creating on caps, we will about to cater to the best options suitable to your necessities and skills as a crafter. Let's generate the hype! Enough of burning the midnight oil for its ShowTime!
The first method you can try is a cap press or hat press. It's the perfect way to transfer the design on hats of different sizes using HTV. Its concept is similar to the application of HTV via heat-press. The difference is specially designed according to the printing requirement for HTV hats, which can provide all the necessary heat printing advantages. Compared to a regular heat press, a hat press can introduce you to its adjustable arm, allowing better reach on the hat's curvature and the cap's peak, front, and sides. This kind of feature restricts the capacity of the application process through a regular heat press.
Quality print is very achievable, as well as convenience and easy customization. Production is also faster compared to printing by a heat press. However, for crafters who are newly starting up a business or personalizing use, this method requires its machine type costs relatively higher whether buying or leasing it, and not everyone can afford it.
The second method, perhaps, is for a crafter who has been doing HTV customization or has been in the printing industry for quite a long time and uses a regular heat press on HTV printing. This way of design transferring can still be helpful. HTV on hats is still pursuable without a cap press machine. It's also simple to imprint a design using simple tools, while the technique could be interesting. The print quality is just the same as a cap press machine. You don't have to worry so much if you can add or not hat customization using HTV to the service that your printing shop can offer.
Lastly, suppose you want to start using Heat Transfer Vinyl on designing hats as your project's new medium but don't have both of the equipment mentioned in the first and second application methods. In that case, a heat printing method through an Iron can be your best alternative. With this technique, iron is good for the hat's curvy edges in terms of sticking the vinyl material on the cap. Using this tool as a method for application makes it easy to maneuver on small surfaces, around the front, back, and the side portion of a hat. You can have the same quality press if you do it properly.
Discover More Great Articles On Crafting!
Learn how to press HTV on shirt and shoes. Please click the links below:
Hat Creation Basics: How to Decorate HTV Hats
Without a cap press for printing HTV on hats, you must always be versatile and adaptable as a crafter. As hats never go out of style and can go with flow beyond time. Your vinyl material plus a dash of creativity can quickly turn the table around with any design flexibly attached to your hat's surface. With or without a cap press, here is a guide on how you can decorate your hat!
How to Heat Press a Hat Using Regular Heat Press and Iron
Things you need to gather:
- Heat Transfer Vinyl ( it can be flocked, glitter, or an HTV suitable to your medium's surface)
- Hat or Cap (according to your preference and suitability for the project)
- Heat Tape
- Heat Transfer Cover Sheet / Teflon Sheet
- Thick towel/ Cotton Cloth and Oven Mittens
- Regular Heat Press or Iron
Procedures:
Step 1: Choosing the Type of Medium
- Before sticking to any design, decide what type of hat you'll use as a medium for your project.
Step 2: Design Preparation
- Identify what design you'll apply to your surface. Using graphic software available on your device, create a layout.
- Don't forget to mirror and adjust the image size to ensure its perfect fit based on the part of the hat where you plan to position the design.
Step 3: Cutting and Weeding
- Cut the design you want to transfer to the hat through a cutting machine.
- After, remove all the excess vinyl material that's not part of the design using a weeding tool.
Step 4: Preparing the Design for Adhering Process
- Place and align the design properly according to the chosen part of the hat you would want to attach. If you plan to stick the design to the hat's front panel, the seam will be your guide in centering it.
- To keep and secure the design in place, use heat tape for both of its edges.
- A Teflon sheet will protect the design against the hot plate of the heat press or iron. It will prevent the HTV from sticking unwantedly, causing damage to it.
- The thick towel or fabric stuffed inside the hat will be something for your hot tool to push against. It will make the cap firm and stay still position.
- Use an oven mitten to protect your hand against burns. To a regular heat press with a flat plate similar to an iron, sometimes the only option to press the heat equally on the design is to push it toward the tool's hot plate.
Step 5: Preparing the Hot Tools
- Get your Heat Press or Iron ready. Checked the heat settings before directly pressing the heat.
For Heat press: The standard temperature setting is about 320 °F, medium to firm pressure, with a time requirement of 15 to 20 seconds.
For an Iron: The heat setting is about 300 °F to 305 °F, firm pressure of 25 to 30 seconds.
- Please note that the application setting may vary. As recommended, follow the HTV setting of the HTV's manufacturing brand.
Step 6: Transfer Process
- For heat-press, place the design with its précised position so heat will be distributed equally. Always start pressing at the center part of your design, moving to the edges.
- For an iron, mirror how you apply heat, similar to a heat press. The temperature of iron is a bit imprecise. Pressure time and temperature are also a bit of trial and error. Using high settings for about 20 seconds will help you adhere to the design but make sure to observe wisely.
Step 7: Cooling Down
- After pressing, avoid rushing or removing the carrier sheet. Please wait for the carrier sheet to cure in, for there are some instances when you pull it out while it's hot and may rip some part or whole parts of your design.
- If some parts of the design didn't attach well, you might repress them for about 15 seconds.
Special Note:
Whether your heat press is a multipurpose type of pressing machine or a regular one, do you know that changing its plate to another attachment; will give your device a new function? Here is an exciting idea! From a flat type of plate surface, you can change it to an attachment applicable for pressing HTV on hats. All you need to do is disassemble the top part of the press and the platen. Once you unscrew those parts, make sure your machine is powered off. Then put the attachment pieces. Remember that attachments may come in different sizes. Better yet, choose the platen size correctly to avoid creases on your final look.
(For a complete detailed disassembling of your machines plate, it is better to check its manual and follow the proper steps of changing your platen)
Bonus Tips: Preventing and Removing Heat Press Marks on Hats
It's explicable; there's no enchanting measurement of temperature that works perfectly for the type of every substrate. Unwanted heat press marks are commonly caused by the machine's edges when pressed firmly or when the substrate is loaded incorrectly in the device, leaving spots and streaks. To avoid this, an essential thing is to use non-stick heat press pillows tucked into your hat's inner sweatband, giving you a firm base and support to the medium's shape. While it undergoes pressing from your machine, it'll avoid bending or twisting.
Secondly, using the right platen size helps you reach the main parts of your substrates without pressing the seam.
Third, in transferring design via heat application, always start at a safe temperature range of about 280°F to 300°F (lower to a high degree).
Fourth, avoid using regular vinyl material for hats if the hat press isn't available. Regular HTV is thinner in sheets, so when pressed may give you wrinkles on your hats. It's better to use flocked or glitter HTV for hats.
Fifth, place a Teflon sheet to the upper platen of the heat press using magnets, or if without the heat press, heat transfer cover sheets will help protect the design against warping.
Finally, if heat press marks appear on the surface of your medium, not on the design, pull back down the hat tout and blow with hot air or temperature the medium's area where the marks appear using a heat gun. Do not blow directly on the design.
You don't need to wait until your hat venture is ready to open! The living legacy of the fashion industry through hats is almost as old as the world itself. Note that people's tastes and the fashion industry's grounds constantly evolve. Therefore, it is not a mistake to place in the hands of your HTV material to get your hat project a spot of tenure in the fashion world and trade niche. Leveling up your shop's services from fabrics or basic hand-me-downs such as clothes to wearable accessories has become part of a human's entire get-up.
Indeed the crafts session with you, our crafting materials, and us. We are like the sun's rays to one another and to other crafters that brighten each other's days. Indeed, there's more quality time and a do-it-yourself bonding that waits for us…
For more vinyl adventures visit our pages.
Social Media Accounts:
FB: CraftVinyl.ca
IG: CraftVinyl.ca
TikTok: craftvinyl.ca
For adhesive Vinyl and Heat Transfer Vinyl check out our Website: www.craftvinyl.ca
Cheers for this beautiful day! I can't wait for the next session to come again!


