


Adhesive Vinyl on Tumblers

Application of Adhesive Vinyl on Tumblers
One of the most enjoyable things when crafting is being able to decorate and customize your projects with fun designs! Almost anything may be personalized when we use our creativity to be creative! With such material as flexible as Adhesive Vinyl, we can start to imagine all the many things we can do with it, including tumblers!
MATERIALS:
Cutting Machine
Adhesive Vinyl (any Adhesive Vinyl)
Weeding Tools
Tumbler
Scraper Tool or Application tool
We can now begin the process of applying vinyl to the tumbler!
STEP 1: CHOOSING AND PREPARING THE DESIGN
In this step, we have to consider the design's size, the font style's thickness, and its details to ensure that the adhesive we are going to cut will fit nicely with the tumbler we are using. It is important to remember that the bigger designs are way harder to apply as we need to consider the round shape.
We can use any software/application we have or are most comfortable with to create our design. We must first ensure that we have taken the correct measurements. After that, we will modify the size of our design to the measures we took earlier. We must have the right size for our design; this will avoid wrinkles in the finished result.
It is also a good idea to choose a thicker font style because it is easier to apply to the substrate, but if you want to use a tiny font style, that is okay too! All we have to do now is to be extra careful in putting your vinyl on your final substrate.
The overall effect of the adhesive vinyl is based on small details; therefore, check carefully before putting the vinyl to ensure everything is in place.
Lastly, be sure you have correct measurements because if it is too big from your substrate, we will have to start over.

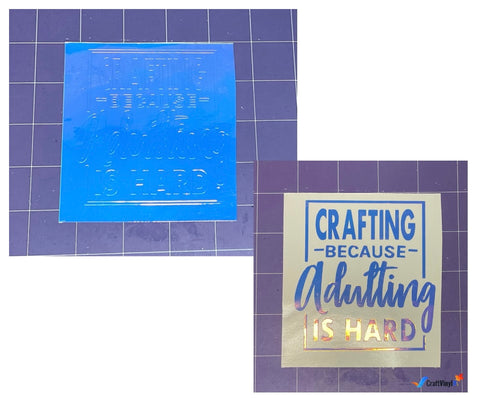
STEP 2: CUT, WEED, AND APPLY TRANSFER TAPE
Resize the vinyl decal to fit the size of your tumbler or other surfaces (be sure to leave space around the sides). Adhesive vinyl does not require mirroring.
Always check the settings and ensure that the appropriate material is what you are using. Place your permanent adhesive vinyl on your cutting mat with the shiny color side up. Start to cut the vinyl with your cutting machine. After that, please send it to be cut.

After cutting, place the mat on your work surface and slowly peel it away from the vinyl. This will make it easier for your vinyl to be removed from the mat without wrinkling.
Next, weed it to eliminate any extra portions you don't want to transfer to your tumbler. You may be able to do this with your fingernail, but a weeding tool is a must.
After the weeding process, you will need a piece of transfer tape to transfer your design to the tumbler. So, all you have to do is to cut out a piece of transfer tape that is nearly the same size as your design, or at least close to it. Remove the transfer tape's backing and apply it to the front of your vinyl decal. To avoid creases and bubbles in your transfer tape, start putting your transfer tape at the corner and make your way outwards. To ensure that the adhesive vinyl on the transfer tape adheres, begin by burnishing it.

STEP 3: PREPARE YOUR SUBSTRATE (TUMBLER)
Clean your tumbler with dish soap and a sponge, then dry it with a clean paper towel. Using a paper towel will guarantee that there are no fibers left on the surface of your substrate (Tumbler). After that, we can use another paper towel and rubbing alcohol to remove any remaining oil or grime and clean our surface as thoroughly as possible. This will affect how well the vinyl decal adheres to the surface.
STEP 4: APPLY THE VINYL
This step is an essential part, so we'll take our time with this. Before applying the adhesive vinyl to the tumbler, remove at least half of the paper backing and scrape it carefully with the scraper tool.

Make sure to scrape all of the design's sections before removing the transfer tape with care. This application of the design is what you call the Hinge method. This is a technique in which we peel off half of the paper backing, stick it into the final substrate, remove the other half of the paper backing, and burnish it once more. This method is ideal for projects incorporating non-flat surfaces, such as cups, and large designs, such as wall decals.

STEP 5: CURING
Allow your project with Adhesive Vinyl to rest for at least one day so that the adhesive vinyl may completely adhere to the tumbler. Curing is a process in which we let the project rest for at least 24-48 hours before doing anything with it.
Note that hand washing the finished product is the best option because if you use a dishwasher, it may be too harsh for it, causing the vinyl to peel off easily.

That's it! We hope you found this blog helpful! Thank you for being so patient! We hope you learned something new today, and if you try it out, please email us your work or message us on social media. And if you have any questions, please don't hesitate to message us, and we will be pleased to answer them! If you enjoyed reading this article, please share it with your family and friends to encourage and inspire them to try and do this craft as well!
Social Media Accounts:
FB: CraftVinyl.ca
IG: CraftVinyl.ca
Tiktok: CraftVinyl.ca
Also, check out our online store, www.CraftVinyl.ca, for more crafting supplies like Adhesive Vinyl and Heat Transfer Vinyl. Thank you for your time and effort; have fun crafting, and stay safe!


