


Printable HTV – How to Seal and Turn it Weatherproof!
Printable HTV – How to Seal and Turn it Weatherproof!
The HTV marketplace has been continuing its growth. For the past years, we’ve noticed some notable changes, one of them being the development of printable HTV, which allows crafters to customize their designs.
Although it can be preached for its’ innovativeness, one factor that most of us fail to discuss is the lifespan this sort of HTV has. Compared to regular HTV, printable HTVs have a shorter life span and tend to fade quickly.
HTV is most commonly for t-shirts, but we must not forget that it’s also a very versatile material that can be applied to not just shirts but also other materials like wood, canvas, glass, etc. It means that even if we don’t want to, it tends to get exposed, which can be somewhat of a problem for Printable HTV.
One factor that heavily affects the quality would be the weather. Either its’ too hot to take or other uncontrolled circumstances that deteriorate the quality of the vinyl.
With that said, I think it’s time to start working first with our Printable HTV! For this, we’re going to need the following materials.
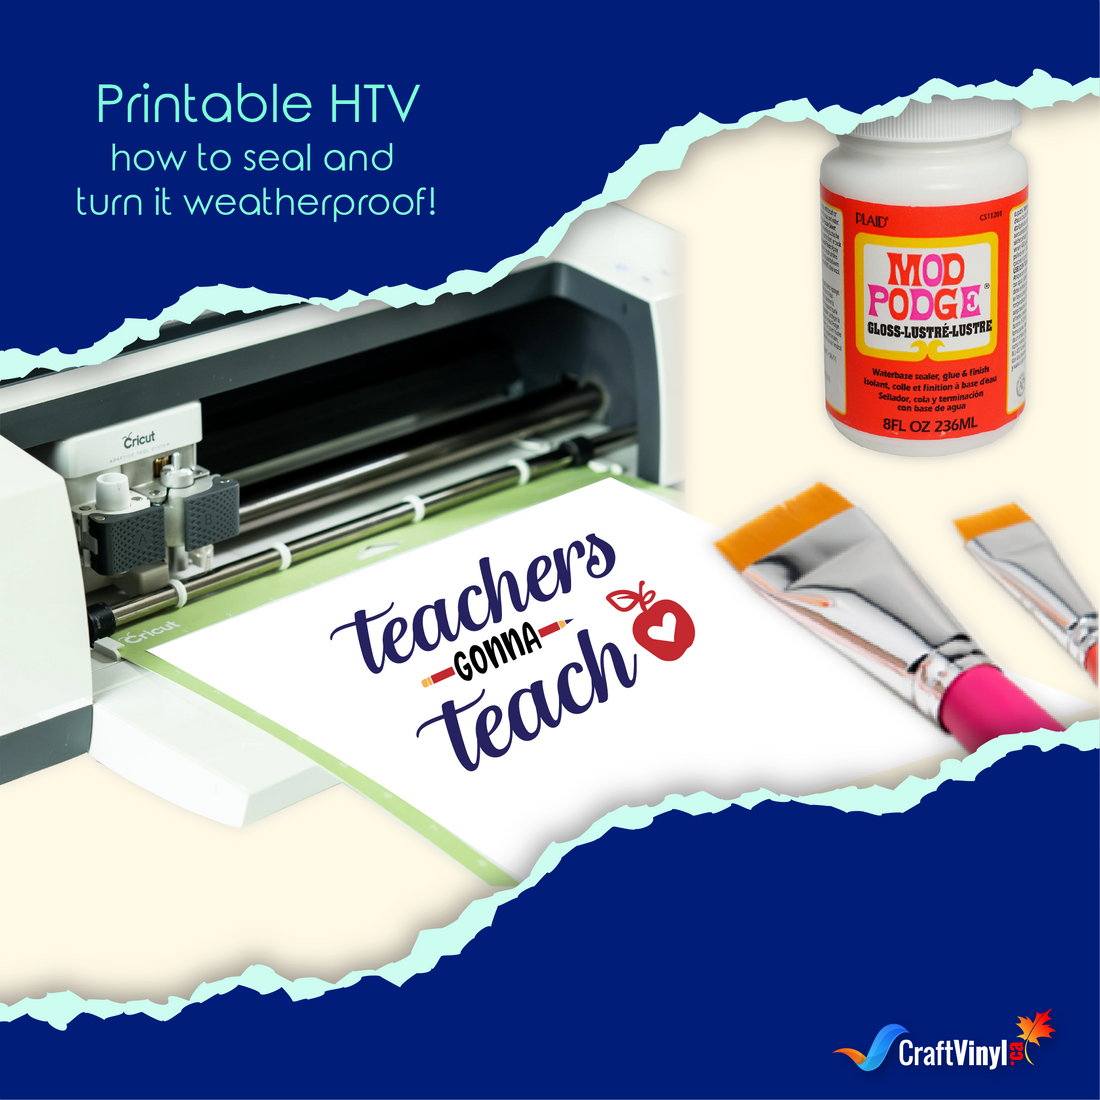
Materials:
- Printable HTV
- Inkjet Printer
- Heat Press or a Household Iron
- Cutting Machine
- Weeding Tools
- Carrier Sheet (Optional)
- Teflon sheet, tea towel, thin towel, Kraft paper, Multi-Use Paper, Parchment paper, Baking paper
Of course, we’re going to need Printable HTV. An essential factor for this project would be to use an Inkjet Printer as you can’t print out using a laser printer with printable HTV.
Similar to most procedures, a heat press is also needed to apply the appropriate heat for the craft. A household iron can be a good alternative, especially if you plan to do this in a small area.
We also need a cutting machine for cutting in the most precise way possible. And, of course, weeding tools to get rid of small pieces and bits we don’t necessarily want on our project.
Carrier sheets come necessarily, especially when dealing with tiny details needed for your ongoing project. Still, if you’re feeling bold enough, you can resort to slowly peeling the printable HTV away, very slowly, and applying everything in the places you prefer.
In the list, you can view options that you can choose from to serve as a protective barrier between your HTV and your heat applicator. That would ensure that your HTV won’t burn and nothing that wasn’t in our plan would happen.
Now that we’ve the materials needed, it’s time to start crafting!
Steps in applying the Printable HTV:
- Start by choosing and printing your design
- Cut and Weed your final output until satisfied
- Pre-heat the area in which you’re planning to apply the HTV
- Using your hands or your carrier sheet, lay the HTV to your desired location
- Grab your Teflon sheet or the material of your choice and place it on top of the HTV
- Apply steady pressure and heat using your heat press or the household iron.
- Peel the carrier sheet off.
Pre-heating the area, especially if you’re planning to place this on fabric, is reasonably necessary as it removes the excess water and opens up fibers making it easier for the HTV to cling on to; it is common knowledge that HTV dislikes moisture.
Taking the carrier sheet can be done while the material is still warm or cold; this is totally up to you to decide. Always refer to the instructions provided by manufacturers for the best results.
Now for the part, you’ve been waiting for, and probably why you chose this article, how do you protect a printable HTV for the material to withstand uncontrollable weather circumstances?
How to Seal Pintable HTV
Quickly enough, you’ll need two materials, and only two!
- Mod Podge
- Paintbrush
Yes, that’s right! Mod podge is every crafter’s friend. It’s a decoupage medium often used to seal things in order variations of crafting and can also be used as glue.
Using the paintbrush, we will apply a layer of mod podge on top of your craft to make a barrier that can help it resist water and the harsh sun heat.
On first application, you might feel threatened as mod podge will probably make the appearance of your vinyl appear milky. However, just like everything else, let it do its’ wonders and give it a little more time to settle for it to fully dry and return to its’ original colors.
Another common alternative for this would be polyurethane spray. However, we have a few reasons why we don’t recommend this medium.
It’s a lot harsher than the mod podge, and we wouldn’t recommend using it in an indoor space with little ventilation. Although it has been proven to be better than applying nothing, polyurethane is known to turn yellowish, which defeats the purpose of using it, which was to prevent discoloration.
Aside from that, minimal cracks also appear when polyurethane is used, which is something that doesn’t happen when you’re using a mod podge. These are the only observations we’ve made! It is important to note that this decision is totally up to you.
That concludes our blog! Did you learn something from this? Don’t forget to share the knowledge with your friends and family, and attain the chic and outstanding colors of your vinyl crafts for a long time.
Discover More Great Articles On Crafting
If you think of your next HTV project, you may consider a hat, shoes, or leather. Please check the links below:
APPLICATION OF HEAT TRANSFER VINYL TO LEATHER
Don’t forget that you can always share your crafts with us by simply tagging us on our social media accounts and by sending us a direct message through the following accounts listed below:
FB: CraftVinyl.ca
IG: CraftVinyl.ca
TikTok: craftvinyl.ca
Whenever you need new crafting supplies, remember that www.craftvinyl.com is available 24/7 to meet your needs! We offer different Adhesive and HTV perfect for your next project.
With that, we hope you enjoyed it.
Have safe and happy crafting, Crafters!


