


DIY Vinyl Decals for School Supplies: Organize with Style!
Let's face it, school supplies can quickly turn into a chaotic mess. From pencils scattered across the desk to notebooks without a home, keeping everything in order can feel like an impossible task. But what if we told you there's a fun, easy, and super effective way to bring order to the chaos? Enter: DIY Vinyl Decals!
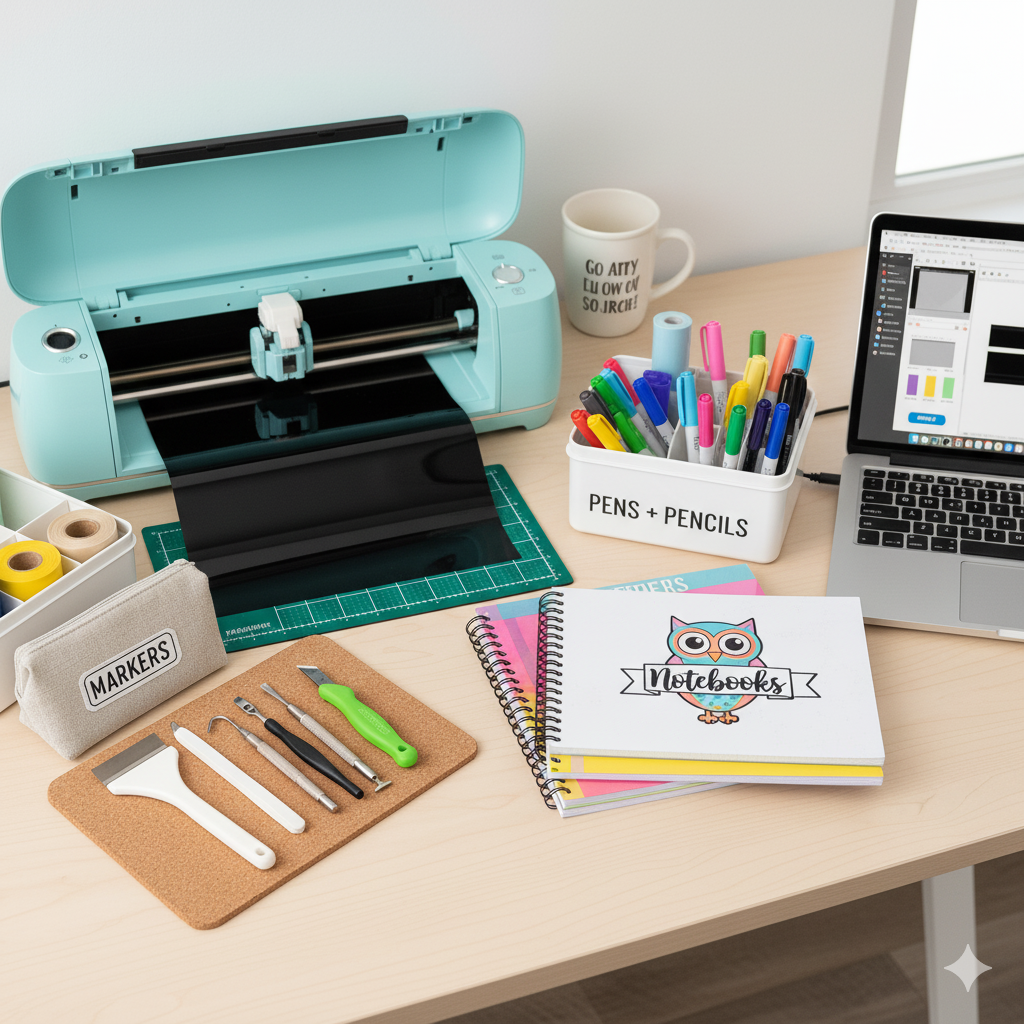
Creating custom vinyl decals for your school supplies is not only incredibly satisfying but also a fantastic way to personalize and streamline your organization system. With a cutting machine like a Cricut or Silhouette, a roll of vinyl, and a little creativity, you can transform plain containers and binders into labeled masterpieces.
Why Vinyl Decals are a Game-Changer for School Organization:
-
Clear Labeling: Instantly identify what goes where, making clean-up a breeze.
-
Durability: Vinyl is long-lasting and waterproof, perfect for high-traffic items.
-
Customization: Choose your fonts, colors, and designs to match your style or a child's preferences.
-
Cost-Effective: Often cheaper than buying pre-labeled containers, and you can reuse them!
-
Fun Activity: A great project for crafters of all ages!
Ready to dive in? Here’s everything you need to know to create your own awesome vinyl decals.
What You'll Need:
-
Electronic Cutting Machine: Cricut Explore Air 2, Cricut Maker, Silhouette Cameo, etc.

-
Adhesive Vinyl: Permanent or removable, depending on your preference. Permanent is great for long-term labels.
-
Cutting Mat: Standard grip for most vinyl.
-
Weeding Tools: Hook tool, tweezers.
-
Transfer Tape: To move your design from the backing to your surface.
-
Scraper Tool/Squeegee: To apply the vinyl smoothly.
-
School Supplies to Organize: Bins, pencil cases, folders, notebooks, caddies.

Step-by-Step Guide: Creating Your Decals
Step 1: Design Your Labels
Open your cutting machine's design software (Cricut Design Space, Silhouette Studio).
-
Choose Your Font: Select a clear, easy-to-read font. San-serif fonts often work best for labels.
-
Type Your Words: Type out the labels you need (e.g., PENS, PENCILS, CRAYONS, MARKERS, NOTEBOOKS, GLUE STICKS).
-
Add Fun Graphics (Optional): If you want to get fancy, you can add small icons or graphics. For example, a small pencil icon next to "PENCILS."
Step 2: Size and Arrange
-
Measure the surfaces you'll be applying the decals to.
-
Adjust the size of your text and graphics in the software to fit perfectly.
-
Arrange your designs on the virtual mat to optimize vinyl usage.
Step 3: Cut Your Vinyl
-
Place your adhesive vinyl onto your cutting mat, liner side down (glossy side up).
-
Load the mat into your machine.
-
Select the correct material setting (e.g., "Premium Vinyl - Permanent").
-
Press "Make It" (Cricut) or "Send" (Silhouette) and watch your machine work its magic!
Step 4: Weed Your Design
-
Once cut, carefully remove the excess vinyl from around your design. This process is called "weeding."
-
Use your weeding tools to remove small inner pieces (like the center of an "O" or "A"). Go slow and be patient!

Step 5: Apply Transfer Tape
-
Cut a piece of transfer tape slightly larger than your weeded design.
-
Place the transfer tape sticky-side down over your vinyl design.
-
Use your scraper tool to burnish (rub firmly) the transfer tape onto the vinyl, ensuring good adhesion.
Step 6: Apply Decal to Your Surface
-
Carefully peel the transfer tape (with your vinyl decal attached) away from the vinyl's paper backing. If the vinyl doesn't stick to the tape, burnish again.
-
Position your decal onto your clean school supply container or item.
-
Use your scraper tool to burnish the vinyl onto the surface.
-
Slowly peel away the transfer tape, leaving your beautiful vinyl decal behind!
Organization Inspiration!
Here are some ideas for where you can use your new vinyl decals:
-
Pencil Bins: Label separate bins for pens, pencils, markers, and colored pencils.
-
Storage Caddies: Great for craft supplies like glue sticks, scissors, and rulers.
-
Notebooks & Binders: Personalize with subjects (Math, Science, History) or names.
-
Folders: Label by subject, project, or type (Homework, To File).
-
Lunch Boxes/Water Bottles: While not strictly "school supplies," vinyl is great for personalizing these too!
With your new, beautifully labeled school supplies, staying organized will be a breeze! No more rummaging around for that elusive red pen or misplacing important papers. You'll have a functional, stylish, and totally custom organization system that makes back-to-school (or just everyday learning) a little bit easier.


